How to: Print Checks in Quickbooks
On this page you will learn how to print checks in Quickbooks. We use Quickbooks to print out checks that we need to send out, you'll use the branded envelopes to mail them.
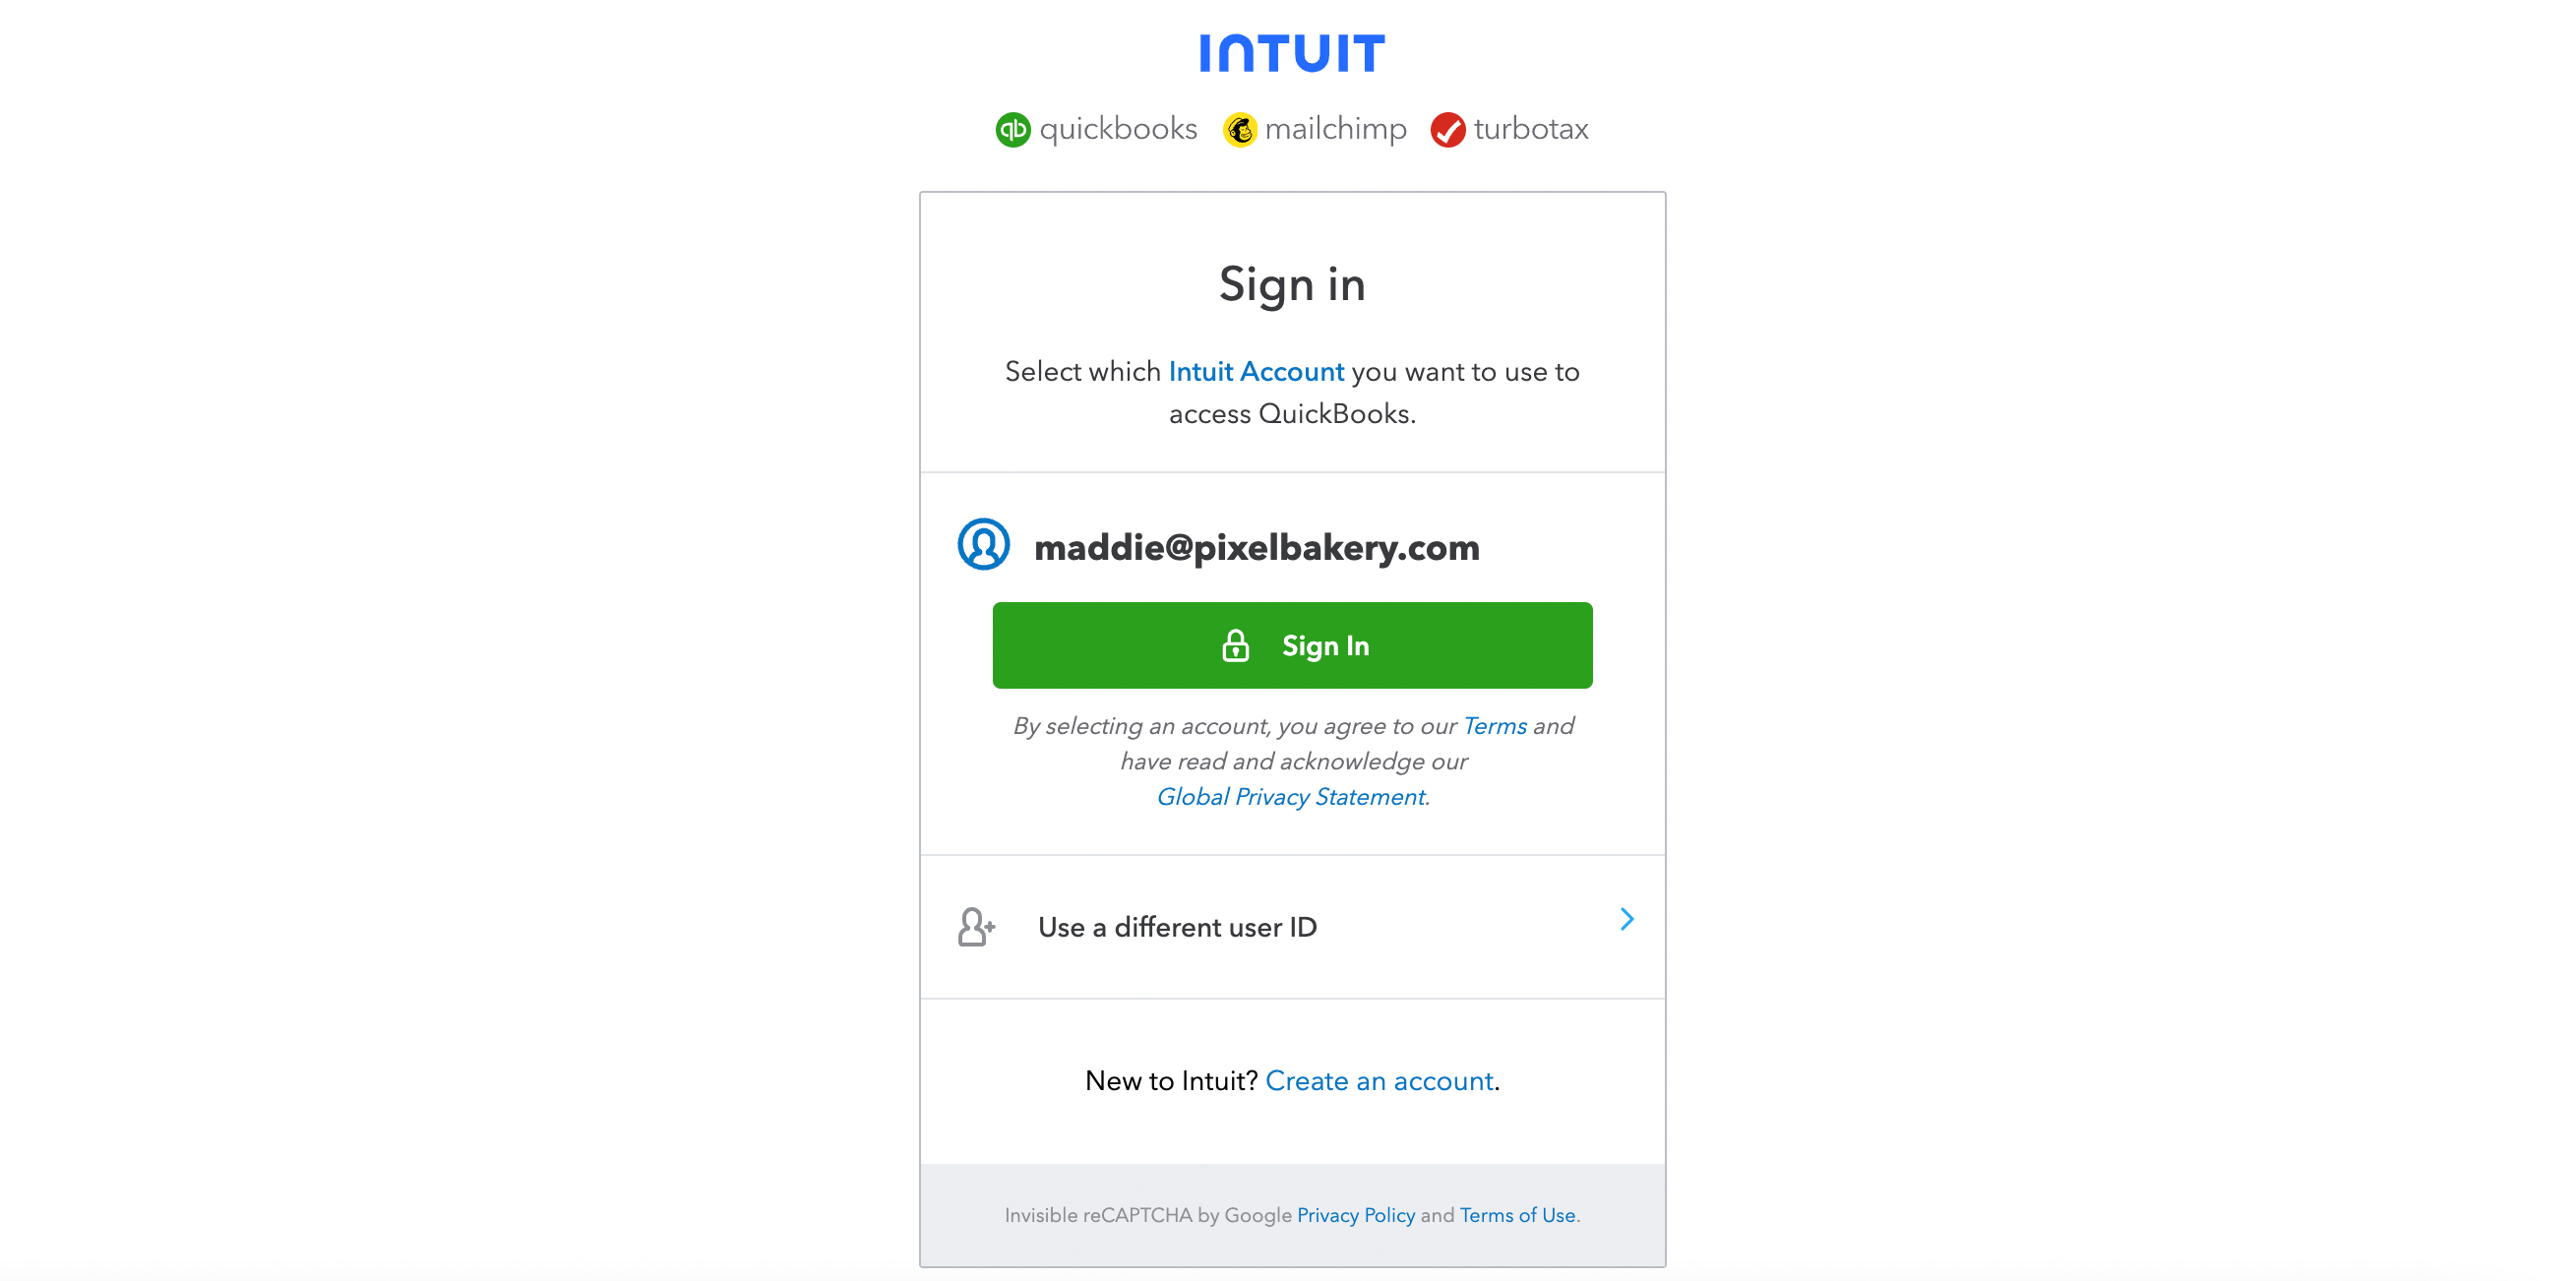
1. Login to Quickbooks.
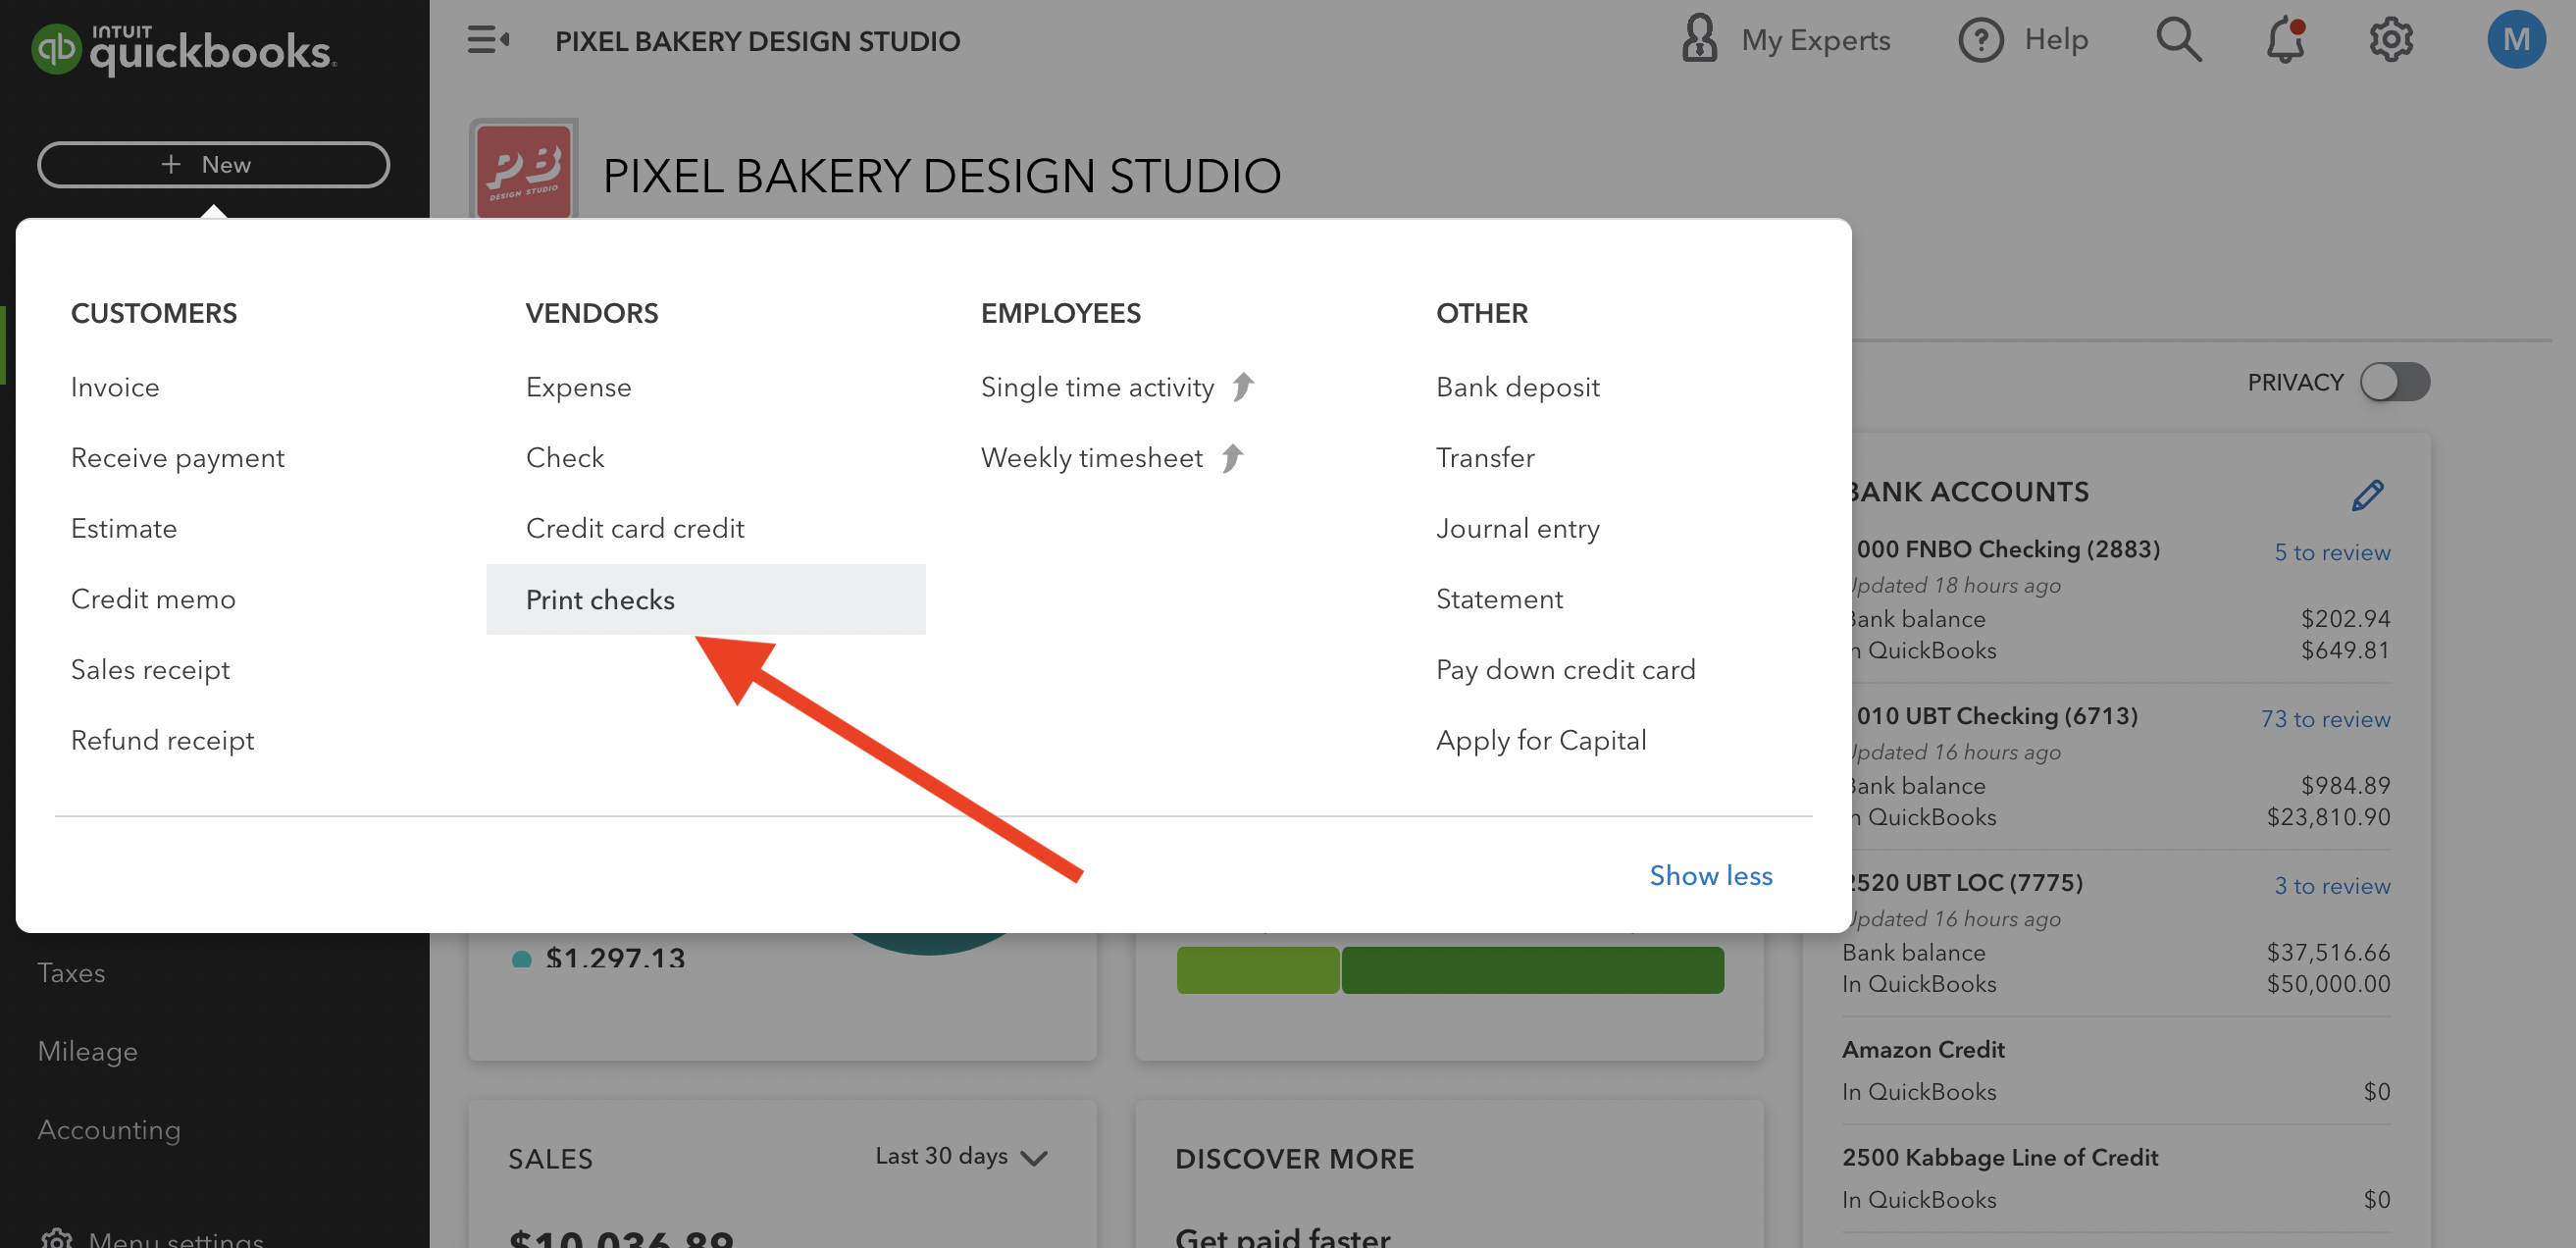
2. Head over to the left side of the screen, press '+ New' and locate 'Print checks.'
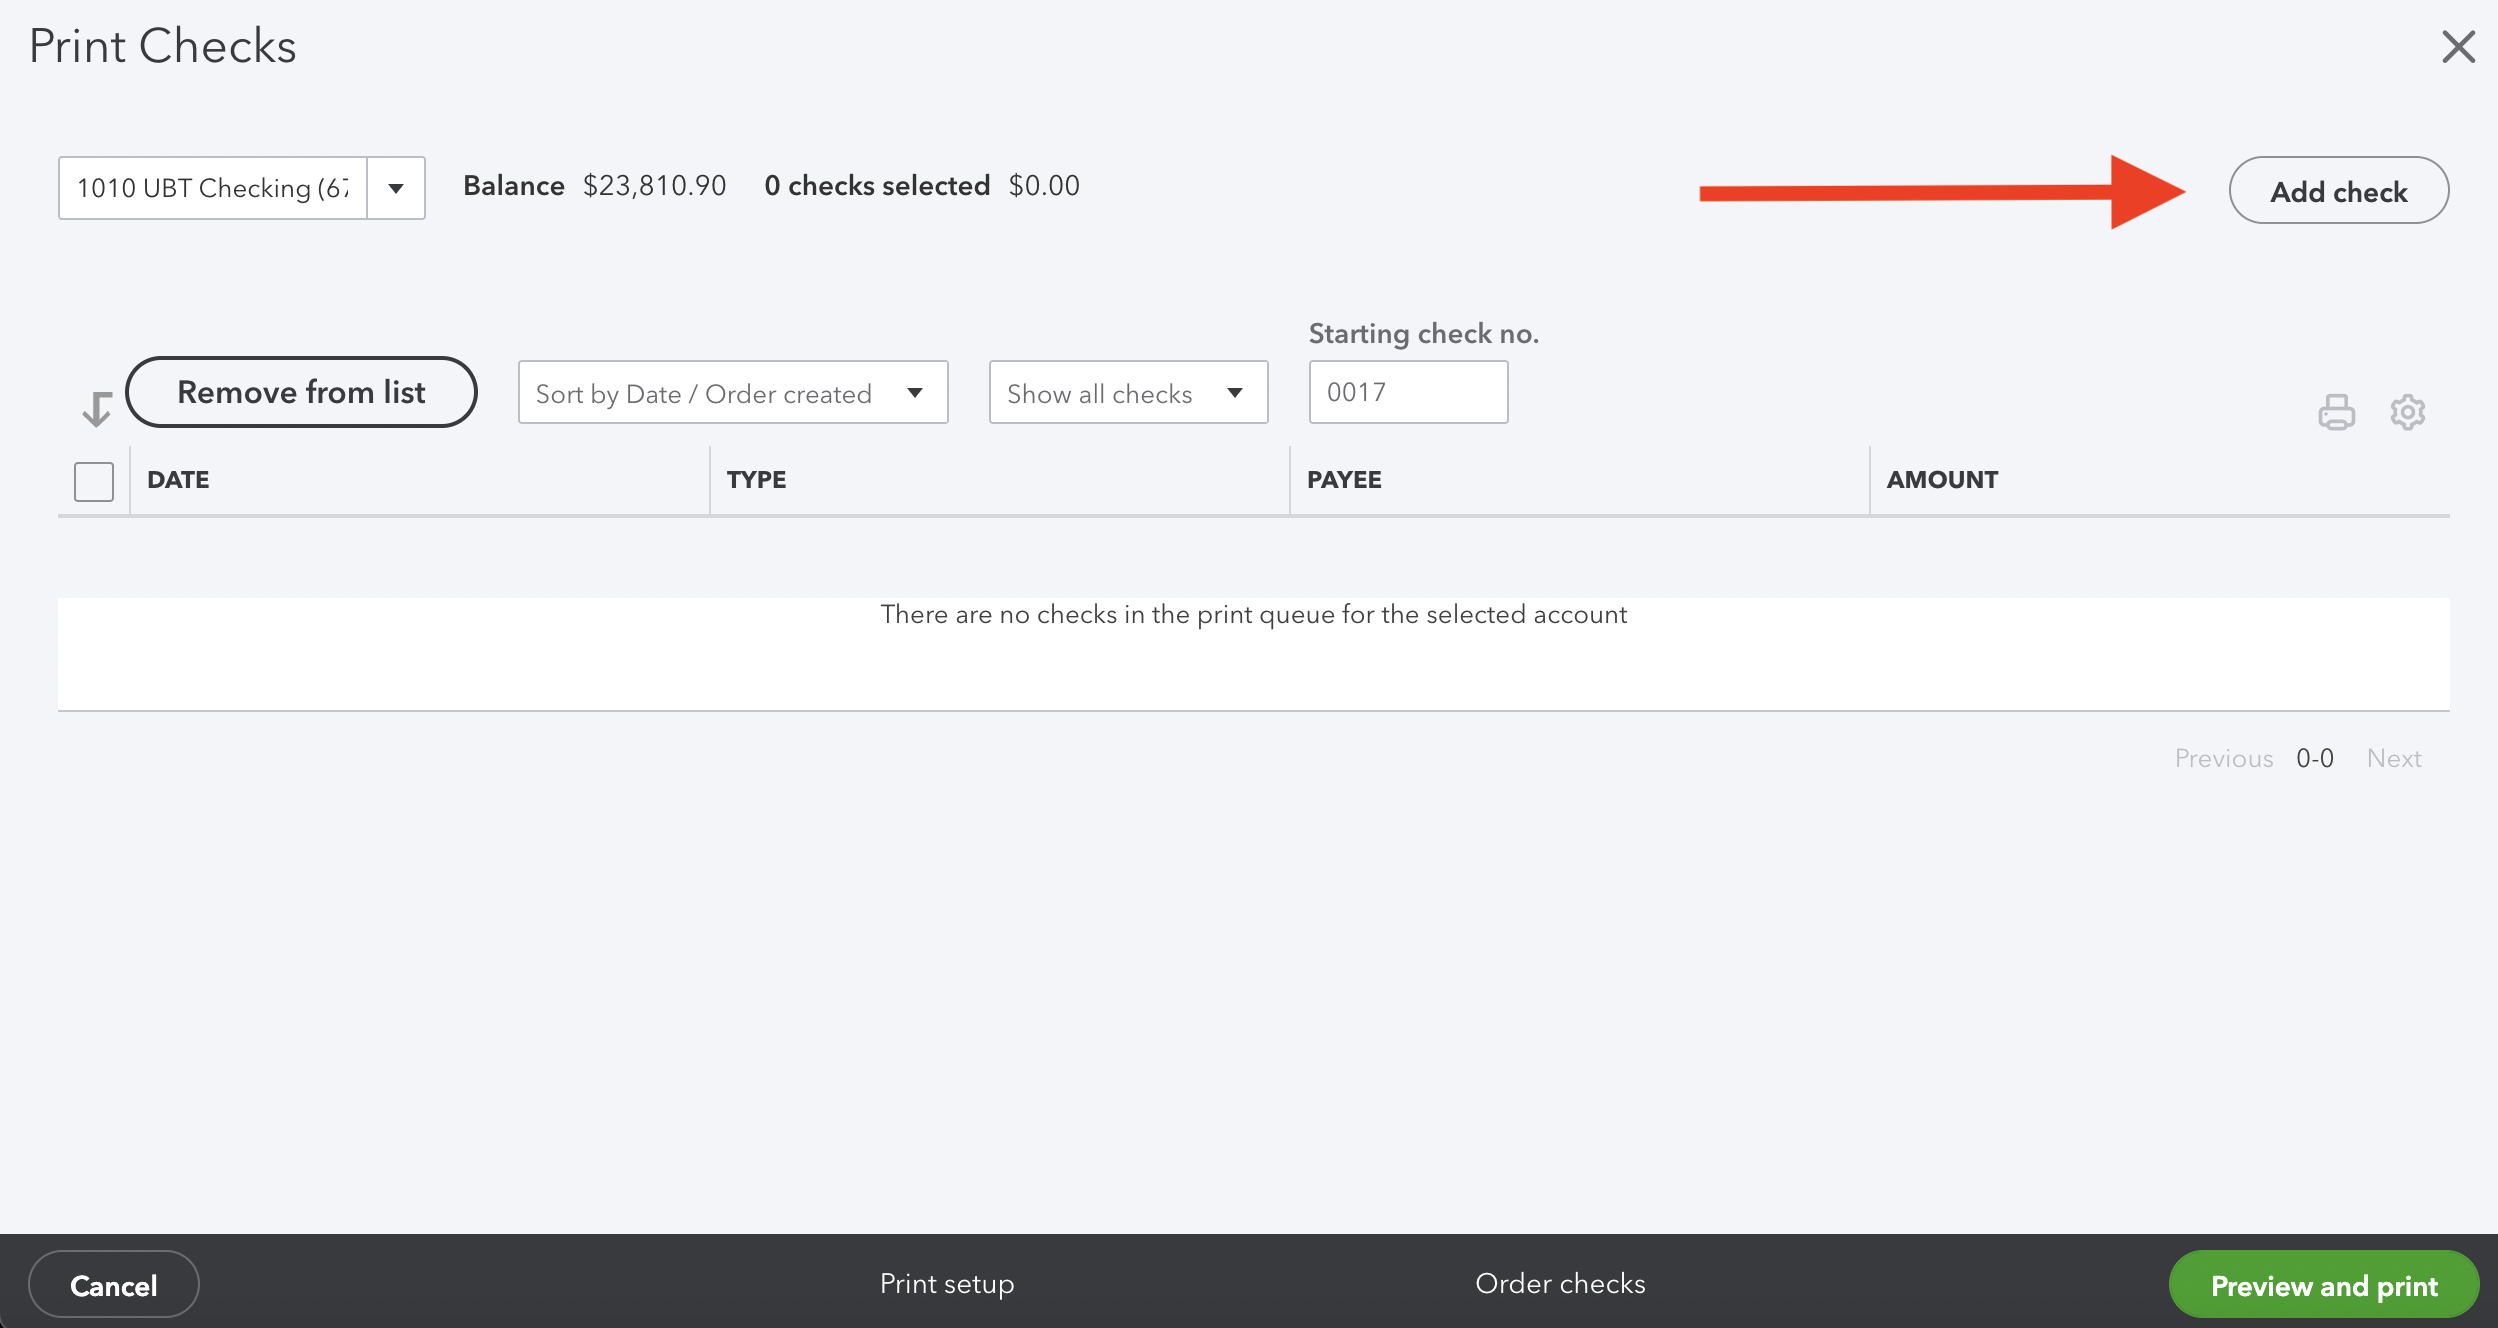
3. Press 'Add Check'
4. You'll find all the information for the check here. So for this example we'll pay off our UBT credit card.
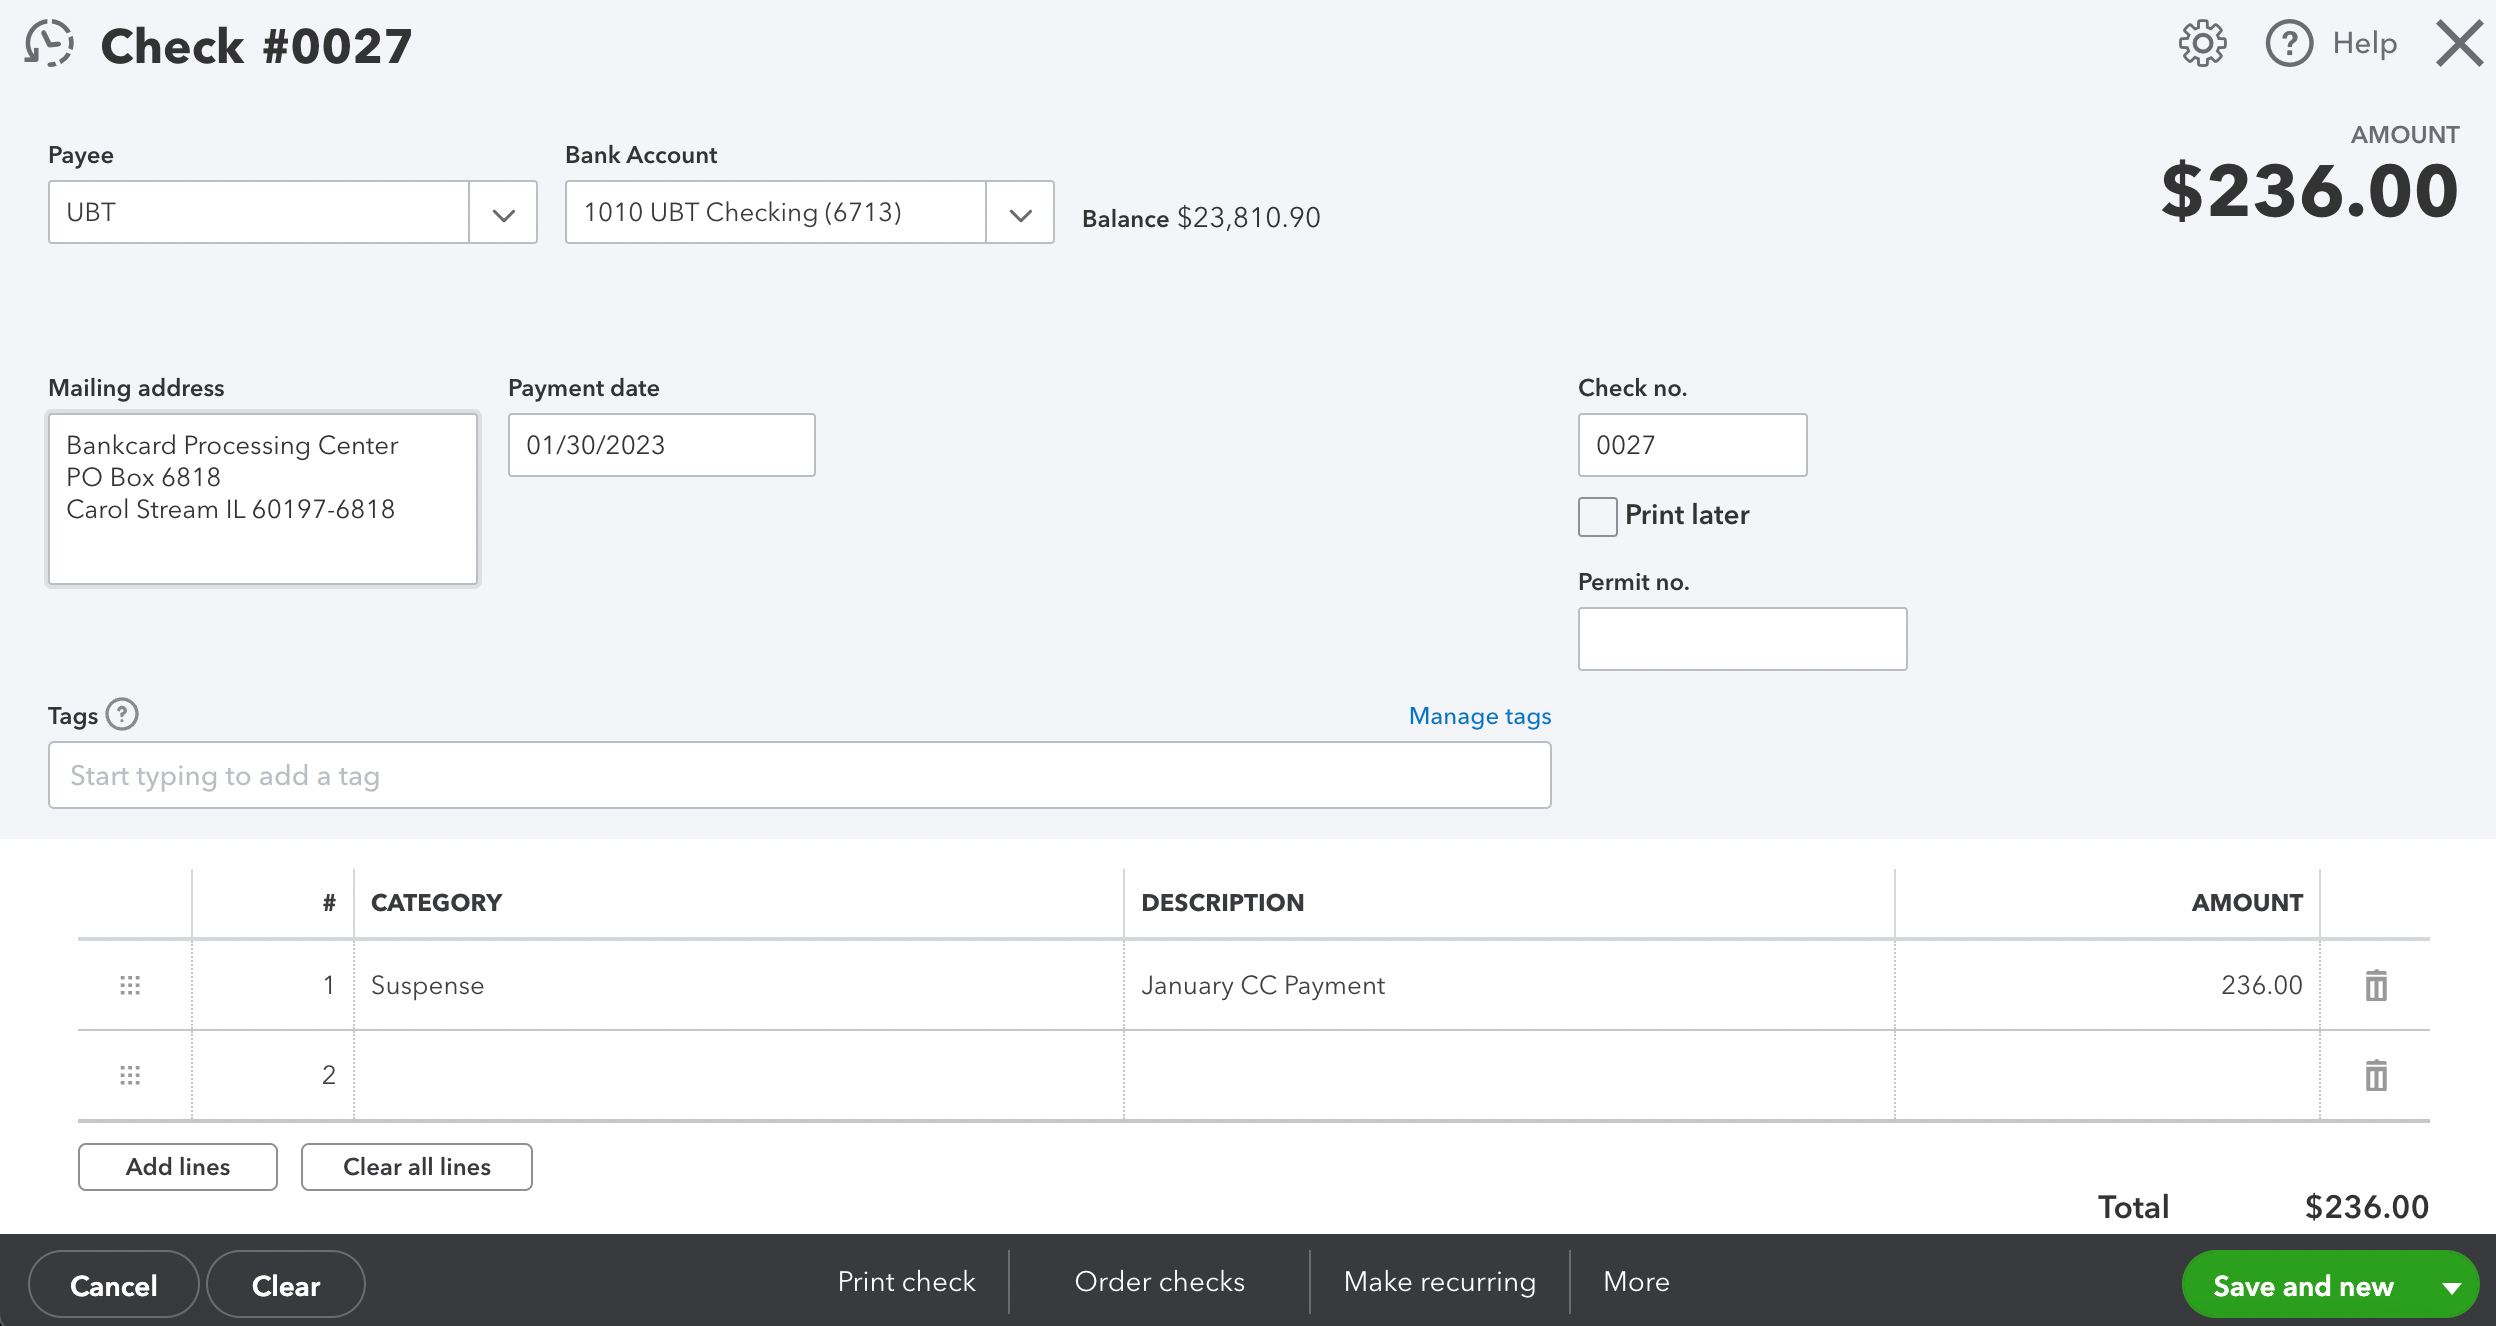
- The payee will be UBT
- The bank account will always be UBT Checking
- Add the mailing address and payment date. Make sure the 'print later' box is unchecked and add the check #.
- Under category you can put 'Suspense.' Add the description and amount.
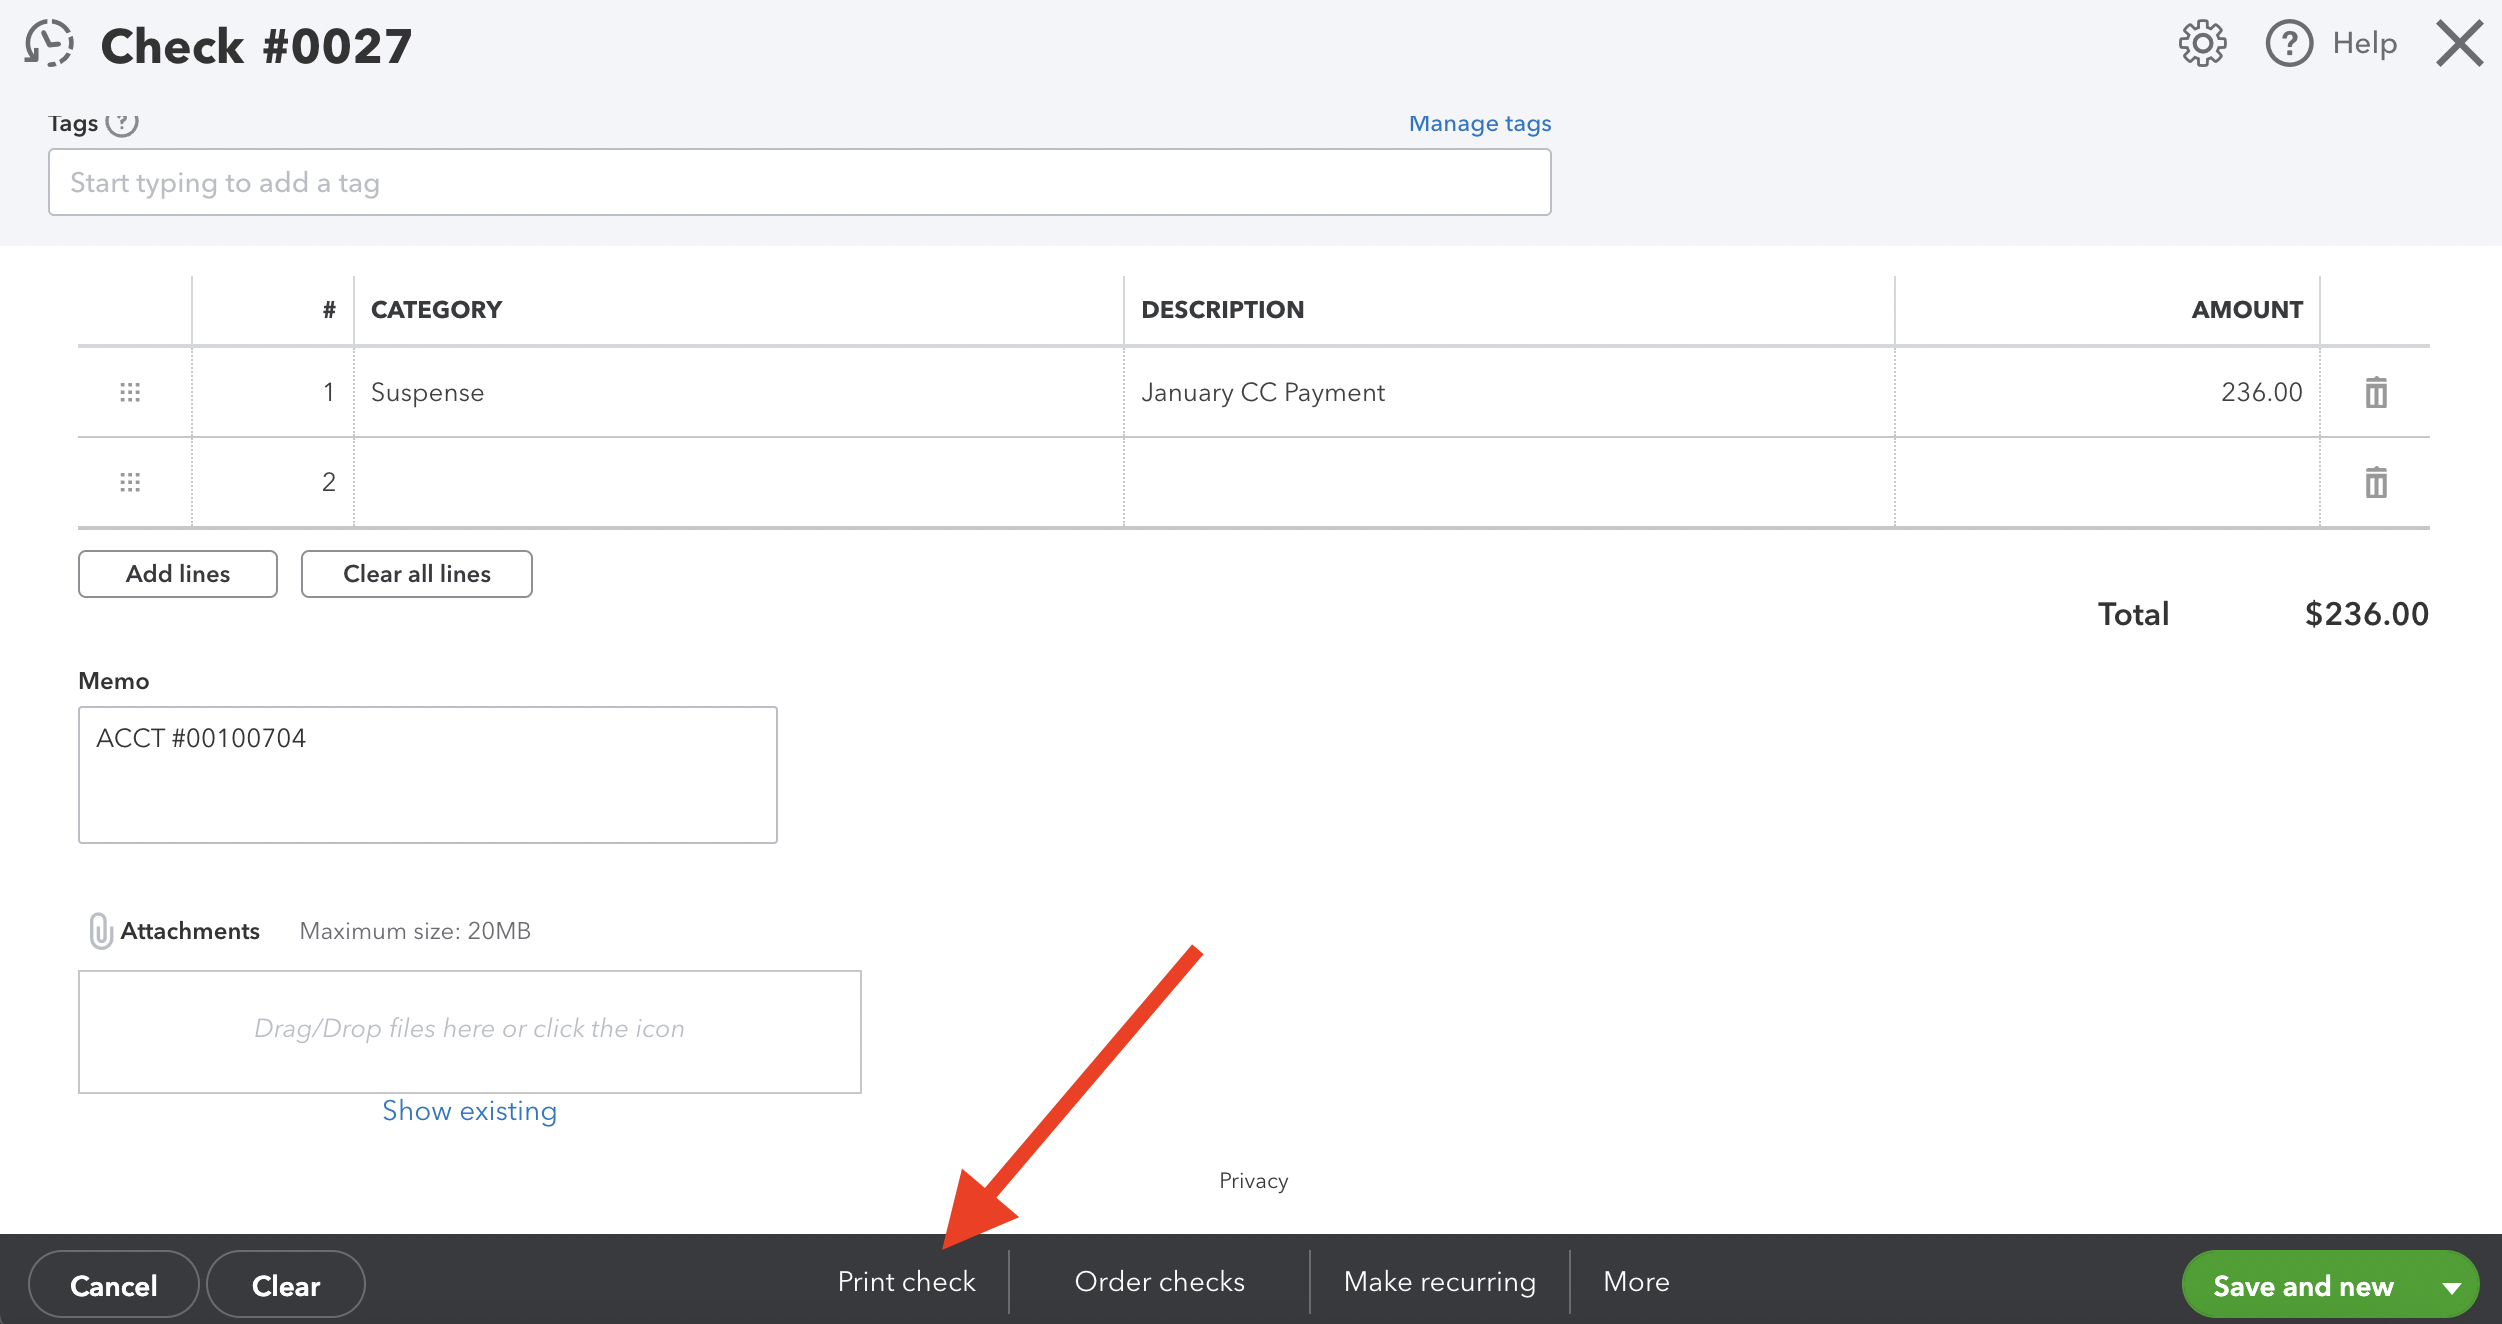
5. You'll want to add a Memo. For this you put our Account #. Then you're ready to print. Click 'Print Check.'
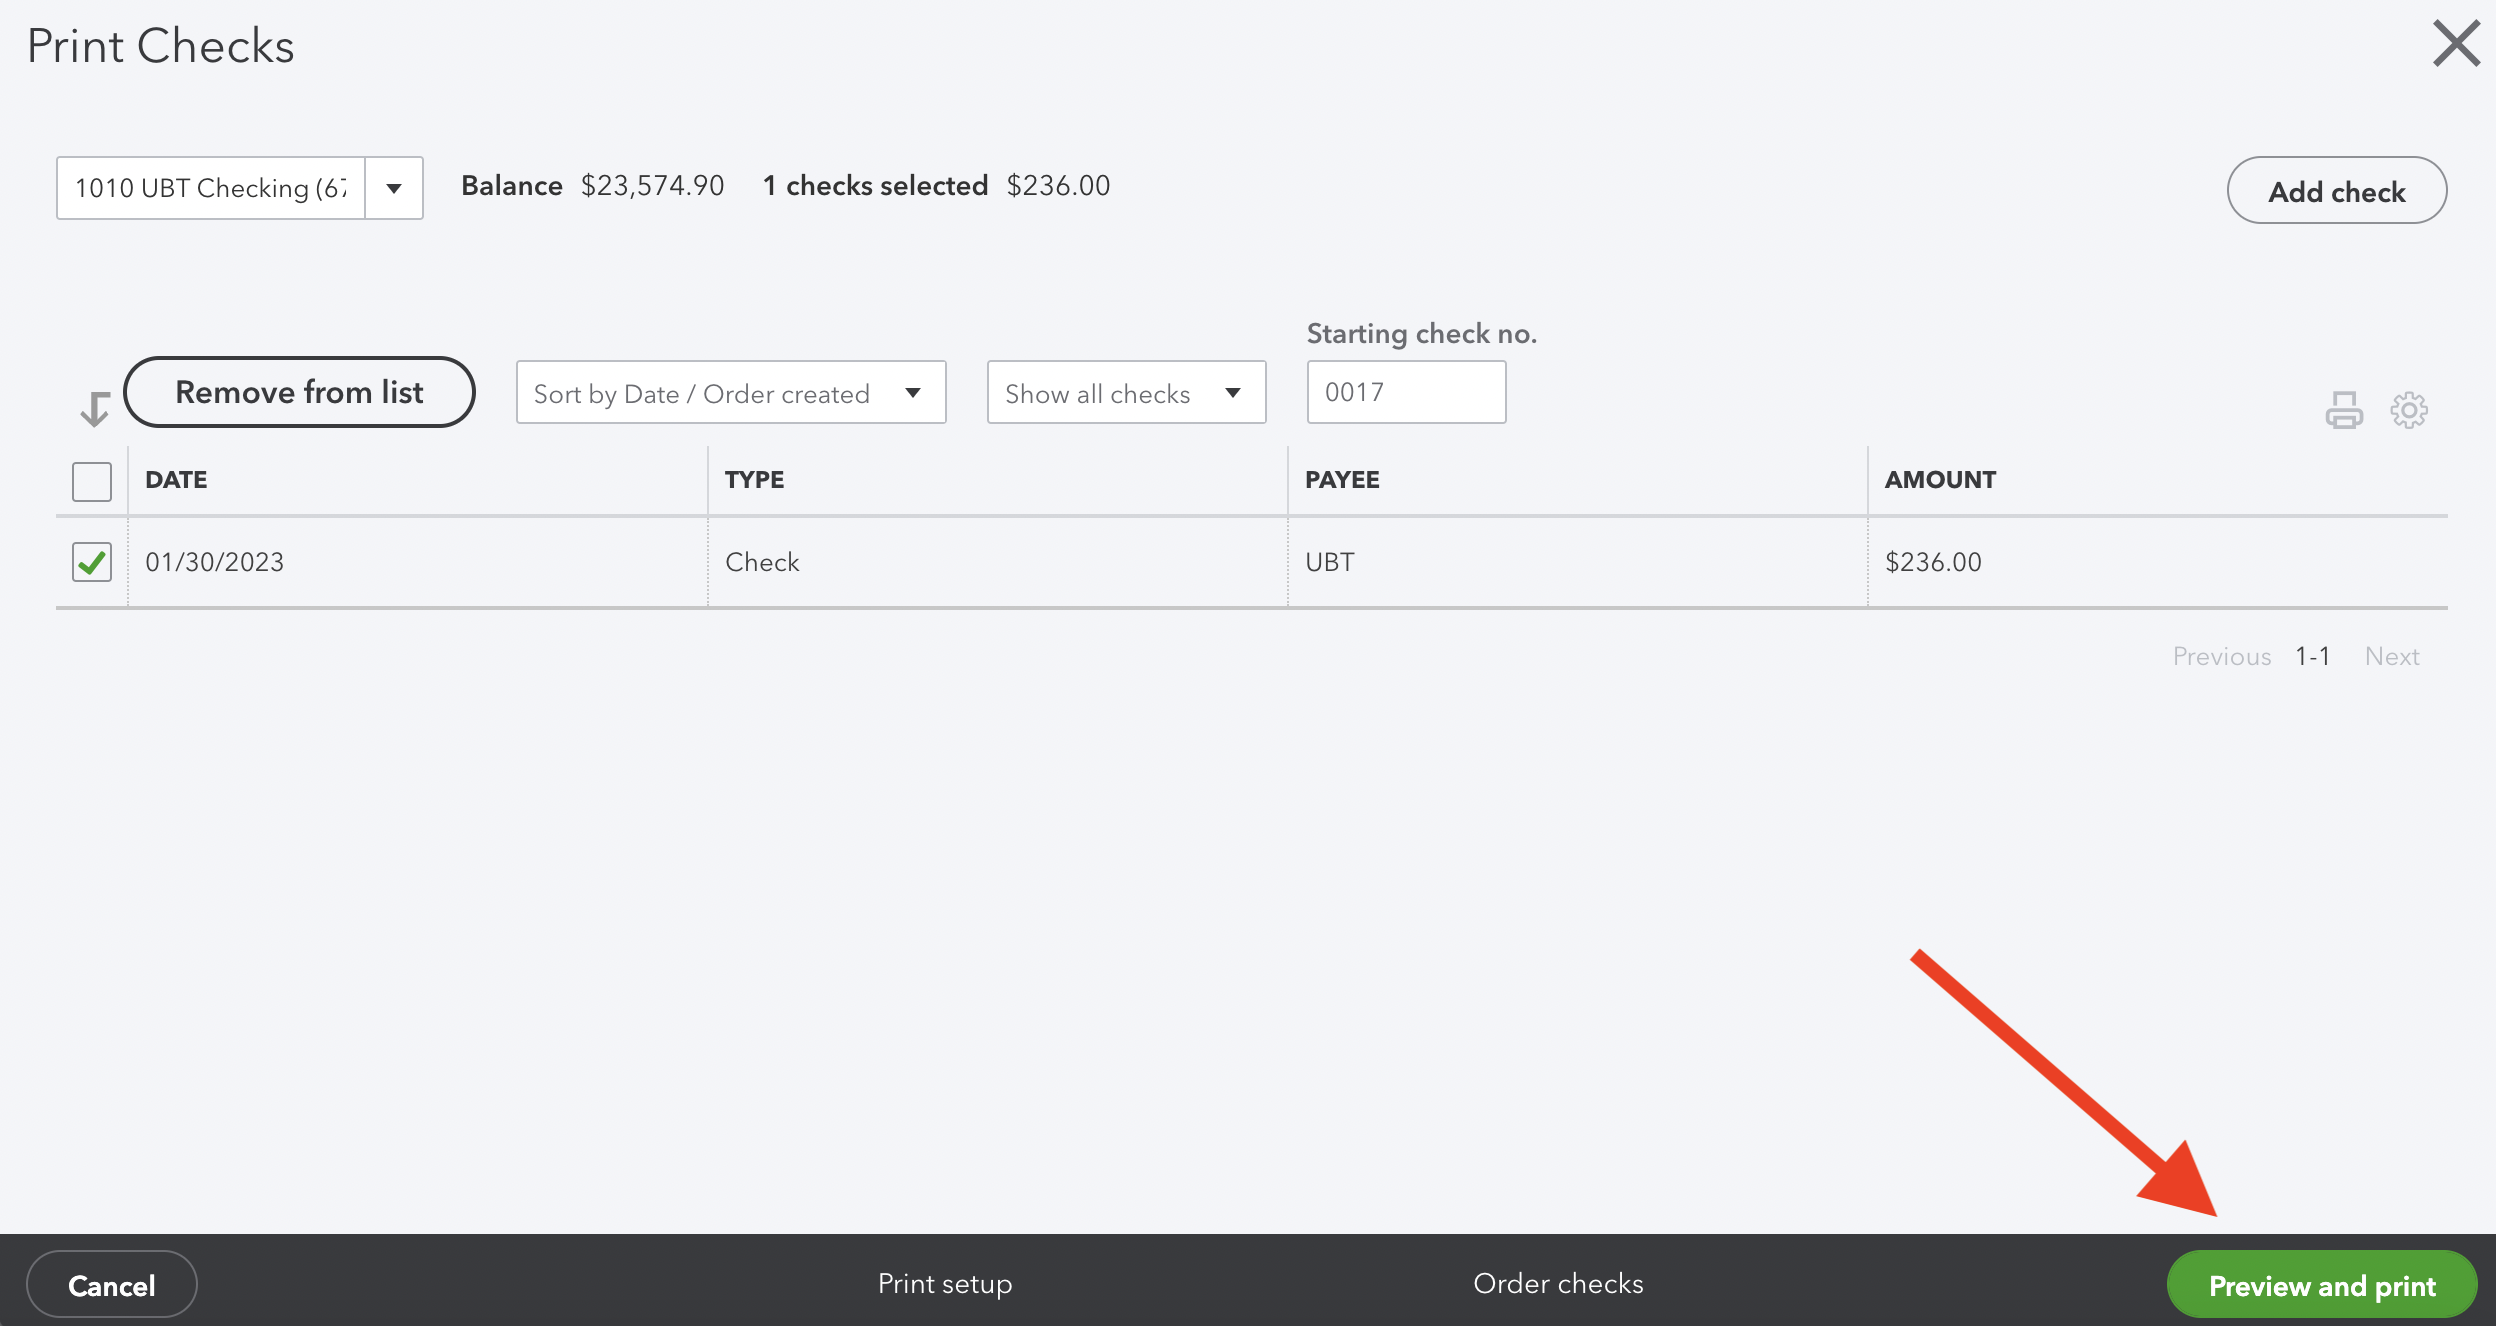
6. You'll be directed to this page where you'll check the box you want to print. Press 'Preview and Print.'
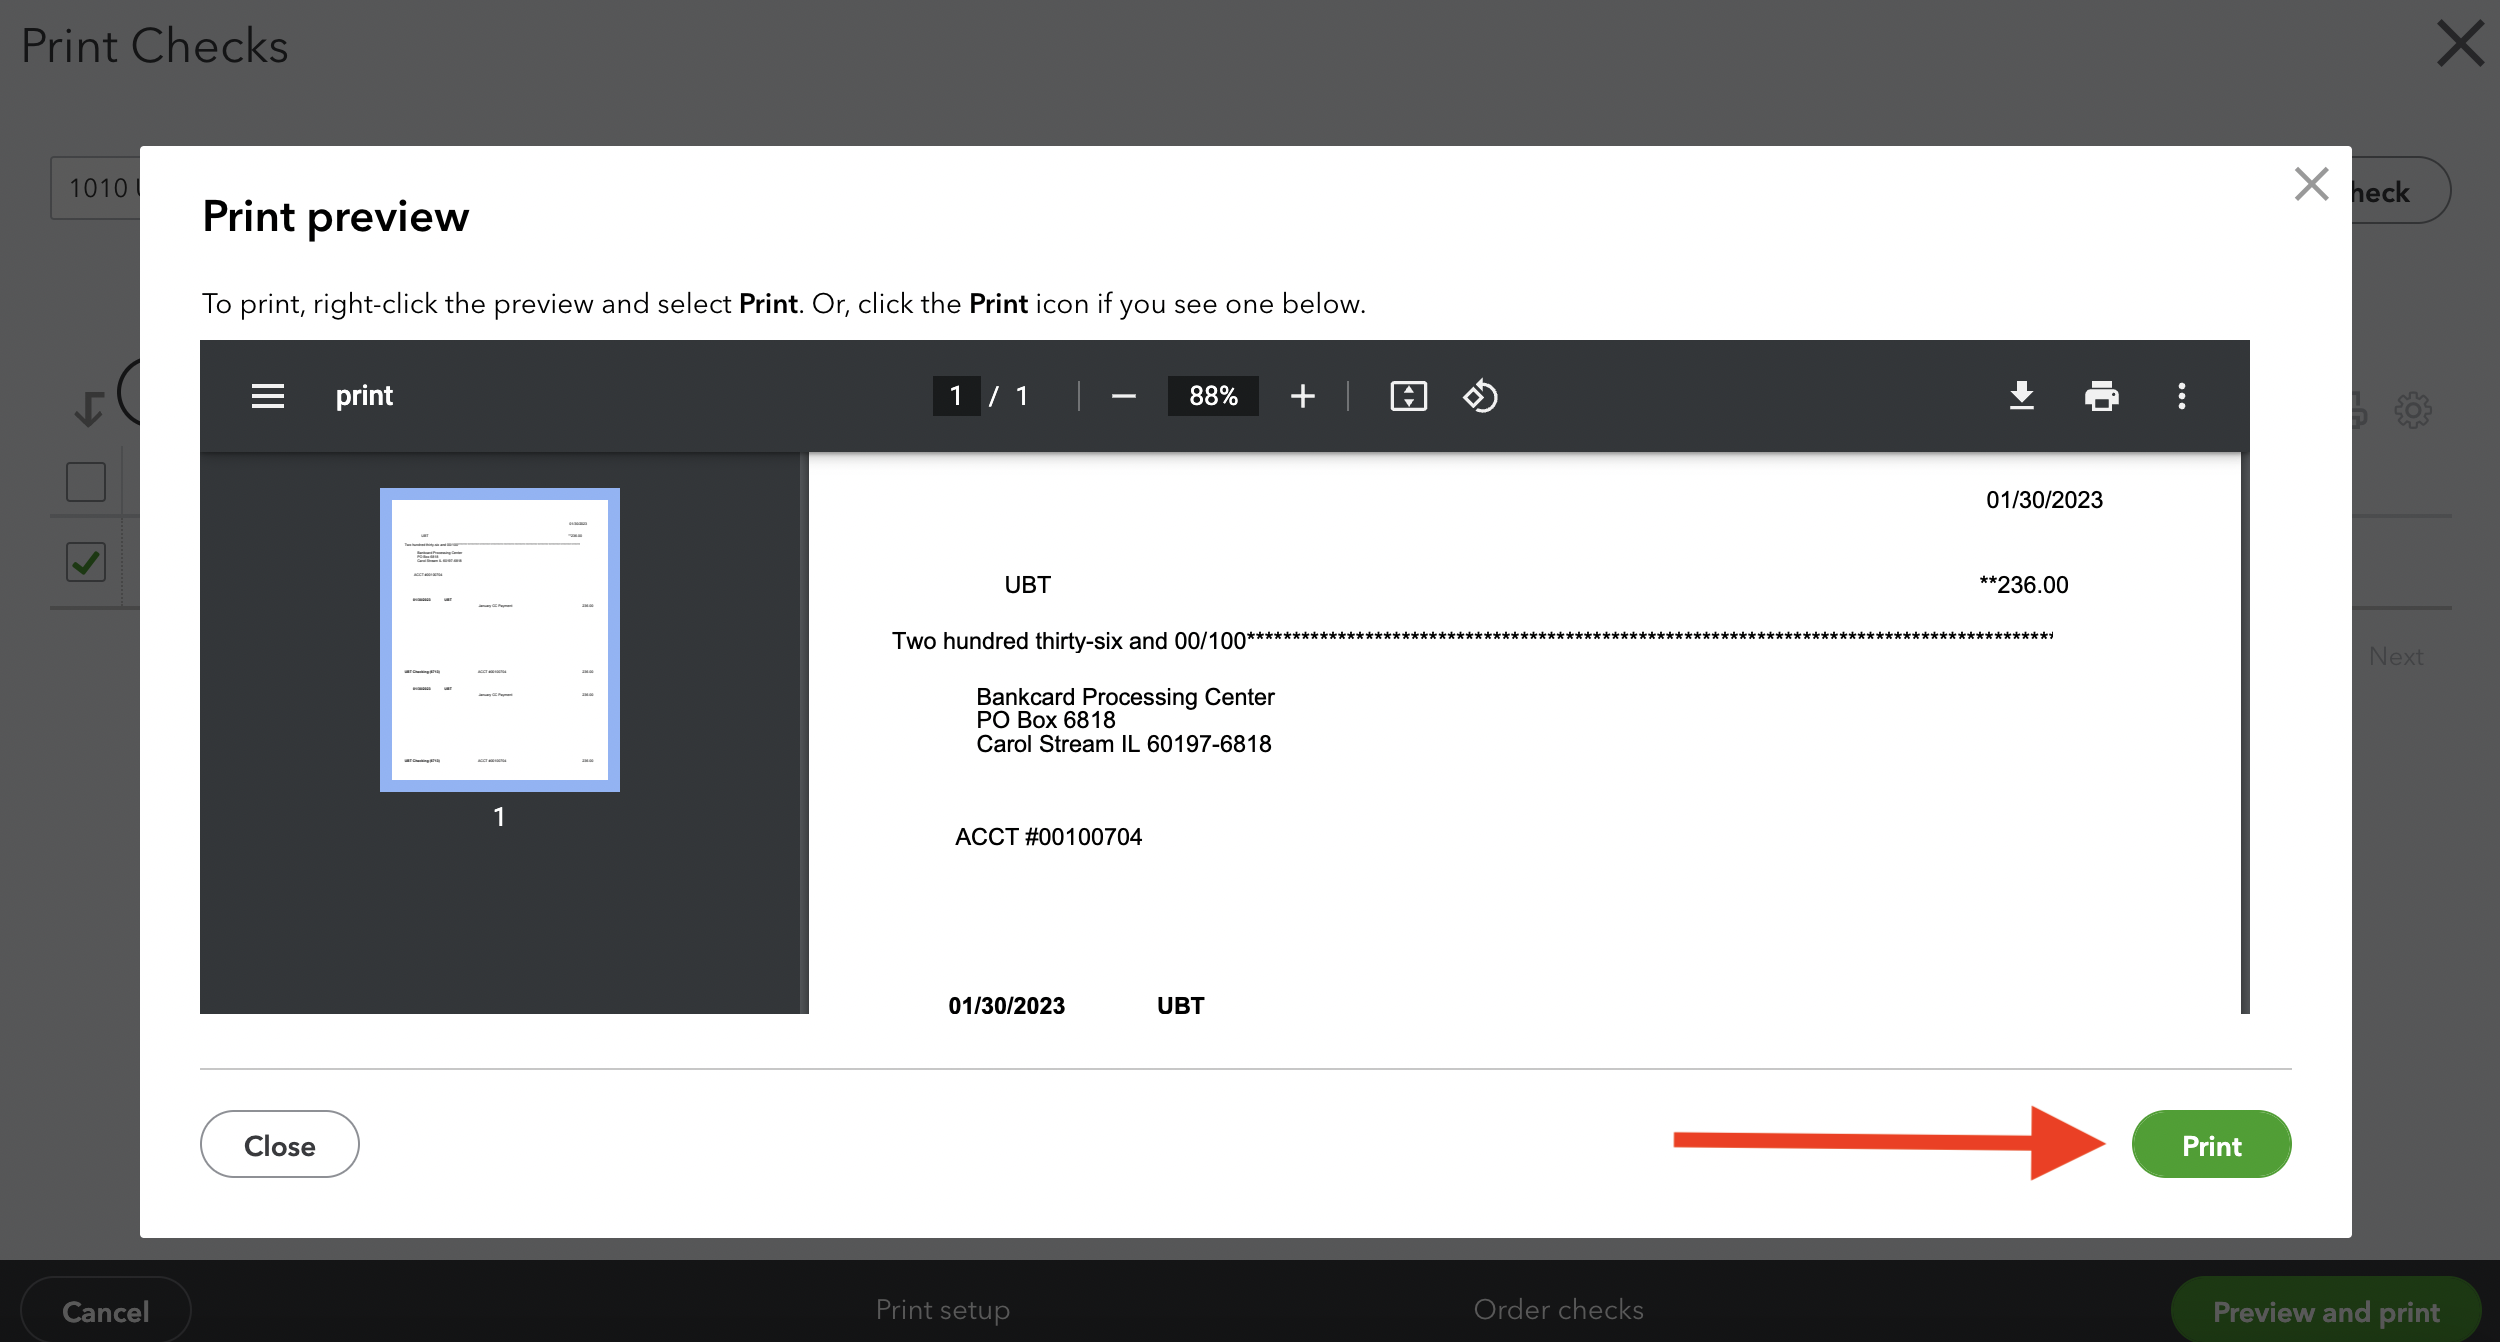
7. You'll be directed to preview your check. If everything looks good press 'print.'
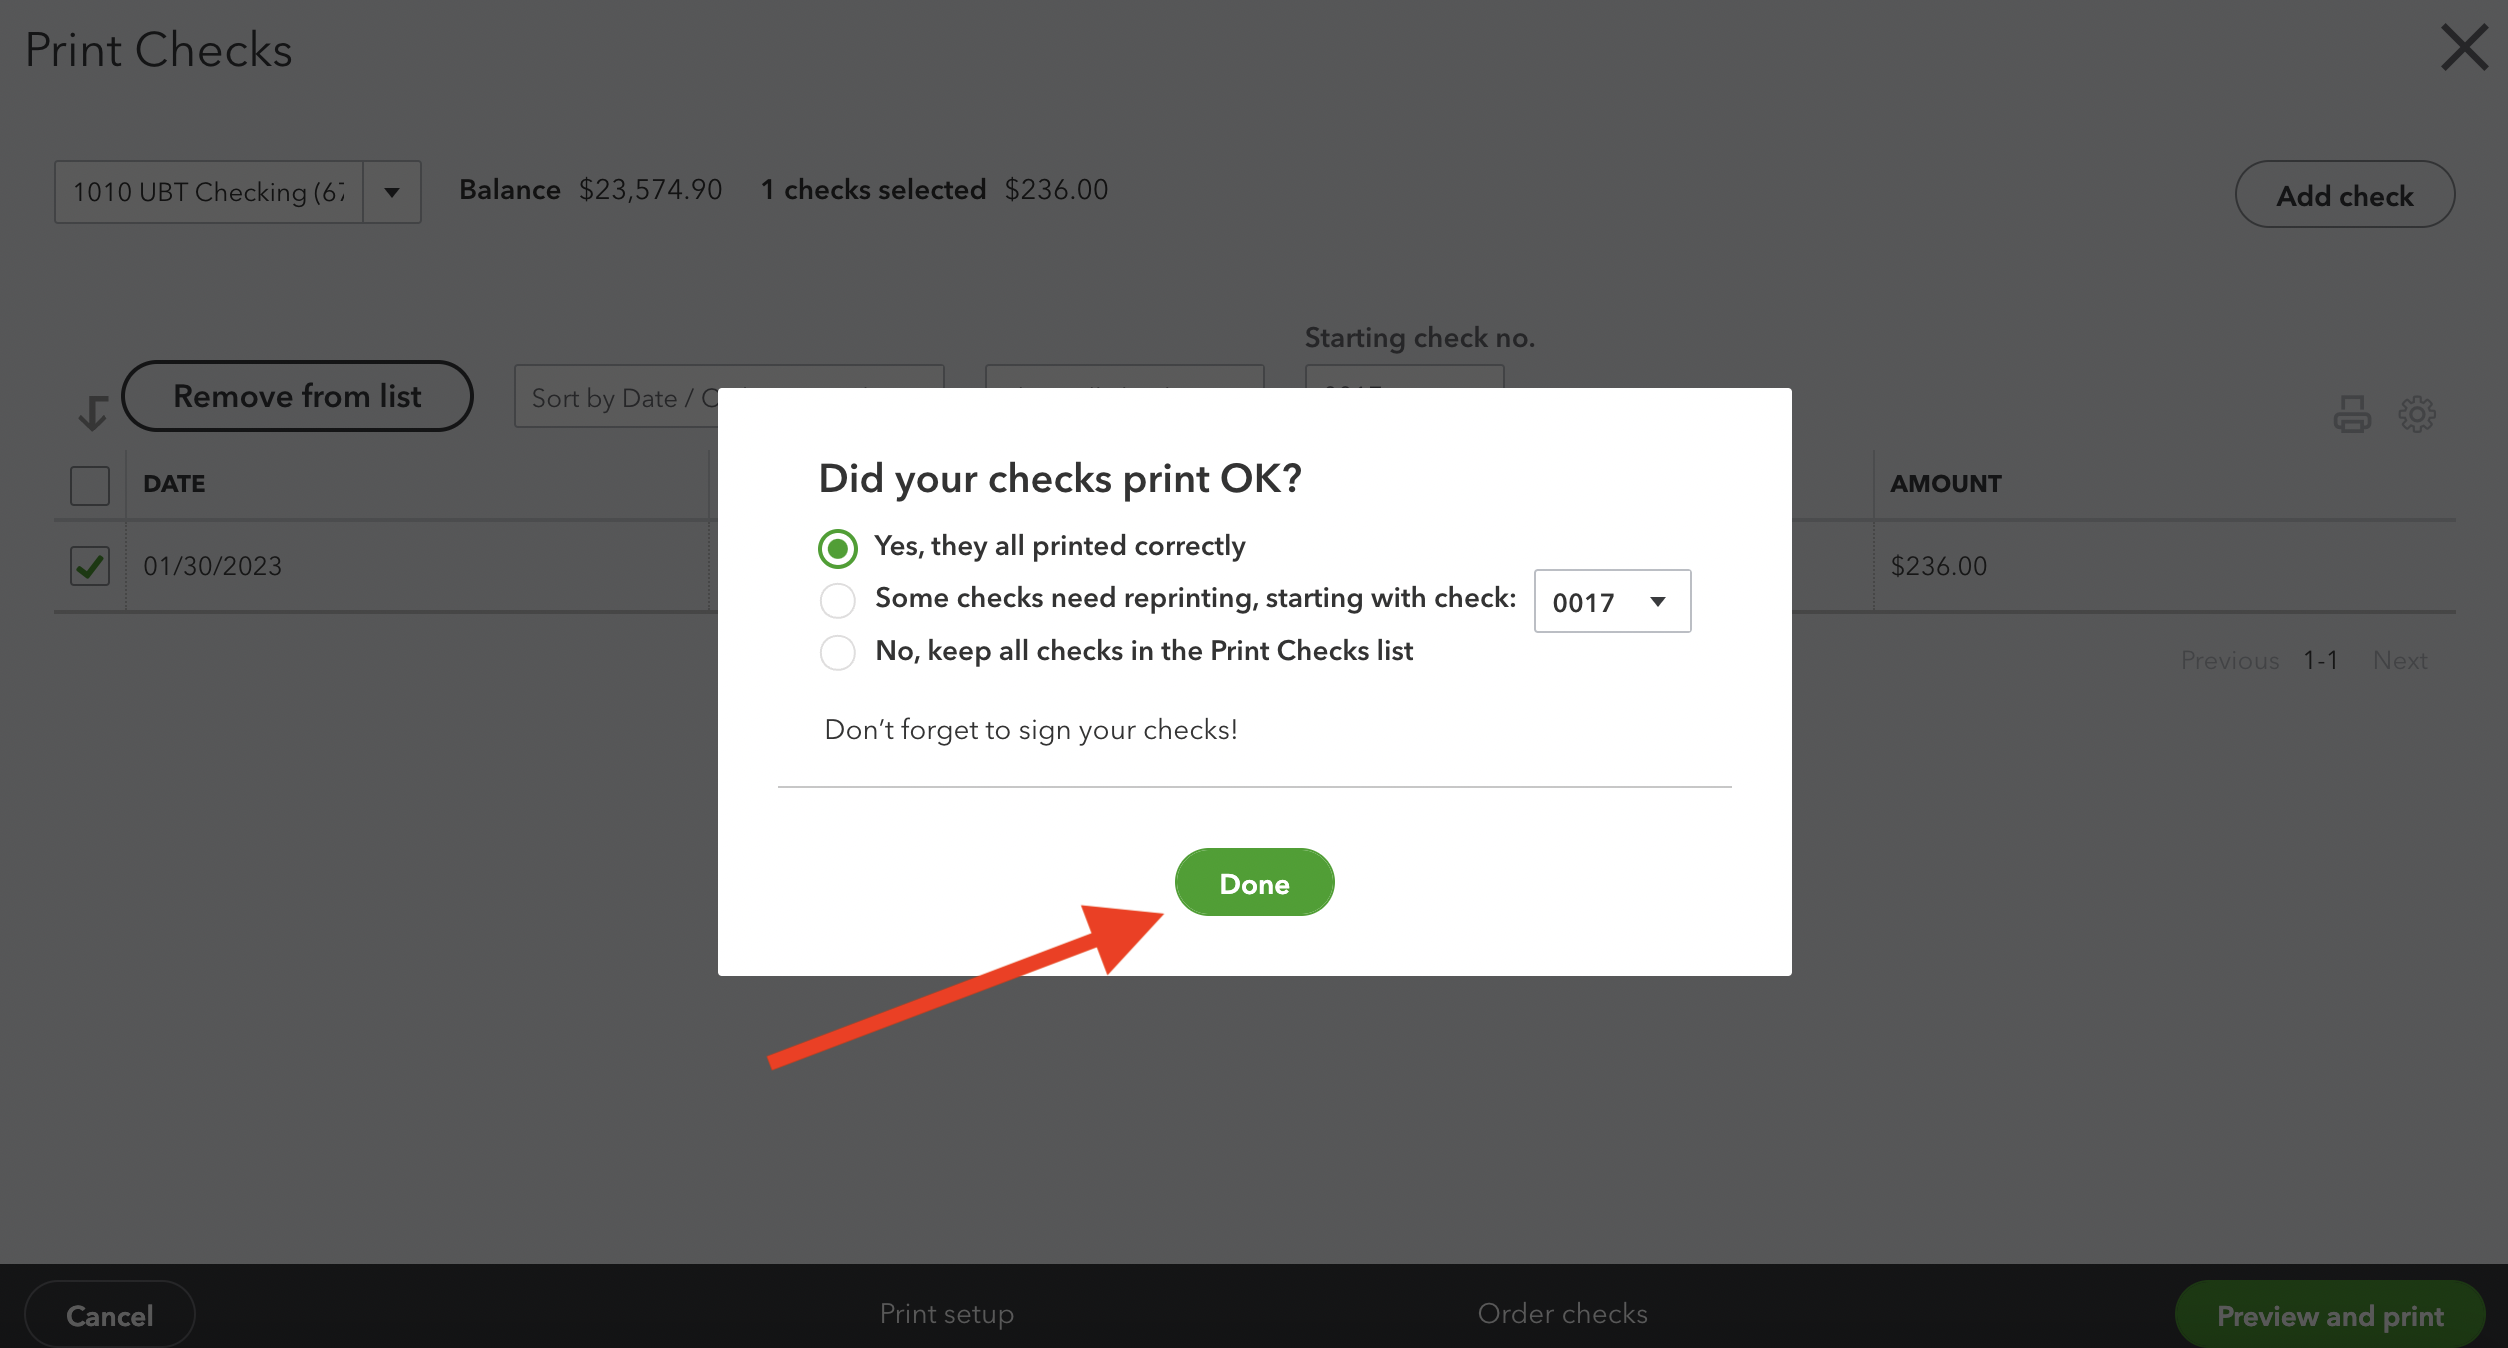
8. Once the check is printed and everything looks good, you can press 'yes, they all printed correctly.'